2016/10/29
2016/10/26
【食譜】[中式] 澎湖美食DIY-澎湖酸瓜滷雞腿
2016/07/10
2016/07/05
2016/03/20
2016/01/22
【食譜】[西式] 波士頓活龍蝦料理(一) 焗烤波龍(波士頓龍蝦)
2015/12/08
【福樂鮮奶優酪食譜】香煎蒜味鱈魚排佐塔香優格醬(合作邀稿)
2015/12/01
2015/11/24
【福樂鮮奶優酪食譜】椰香優格咖哩雞 (合作邀稿)
2015/11/17
2015/11/10
2015/11/06
2015/09/29
2015/09/15
2015/09/11
2015/07/09
2015/07/07
2015/06/14
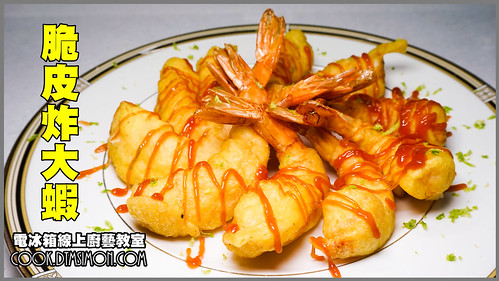
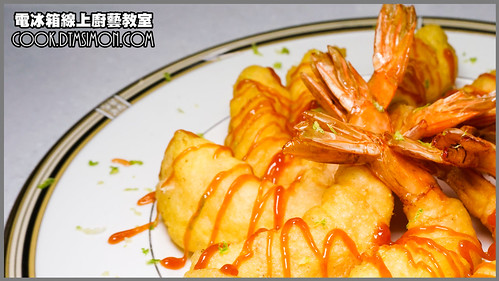
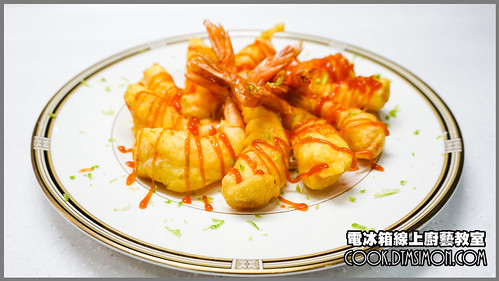
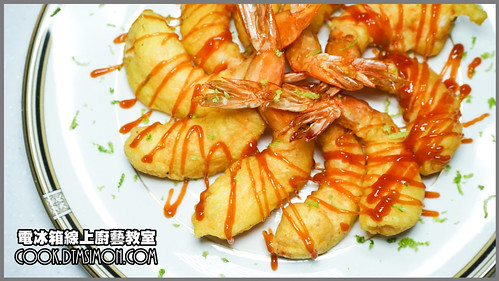
【食譜】[中式] 脆皮炸大蝦(附影音示範)
蝦子的吃法裡面,炸蝦應該是受最多人歡迎的一種。只是在外面要吃炸蝦,一來往往所費不貲,二來用什麼油炸也讓人很擔心。
其實炸蝦一點都不難,跟著冰箱的步驟,輕輕鬆鬆變成炸蝦高手將不再是夢喔!
🇺🇸 Read in English
Among all the ways to enjoy shrimp, deep-fried shrimp is probably the most popular. However, eating it at restaurants can be expensive, and the quality of the frying oil is often a concern.
Actually, making fried shrimp is not difficult at all. Follow my steps, and becoming a fried shrimp master will no longer be just a dream!
準備材料 (Ingredients)
🛒 準備材料
- 鮮蝦 (Fresh Shrimp): 適量
- 檸檬 (Lemon): 1 顆 (取皮屑提味用)
- 起司脆酥粉 (Cheese Crispy Frying Batter Mix): 適量
- 番茄醬 (Ketchup): 適量 (沾醬用)
作法步驟 (Instructions)
-
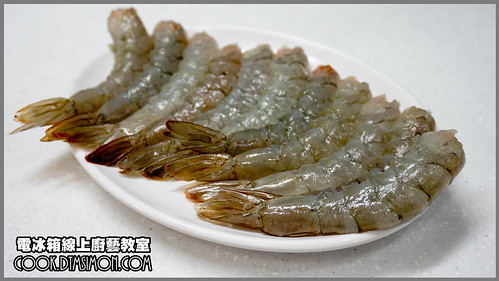
鮮蝦處理:鮮蝦去頭、去殼,保留尾段備用。
(Remove the head and shell of the fresh shrimp, leaving the tail section intact, and set aside.) -
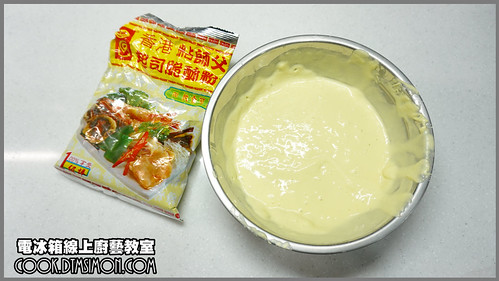
調製麵糊:脆酥粉加水拌勻,濃稠程度差不多是用筷子沾了不會馬上流下來就可以了。
(Mix the crispy batter powder with water. The consistency should be thick enough that it doesn't immediately drip off a chopstick.)
-
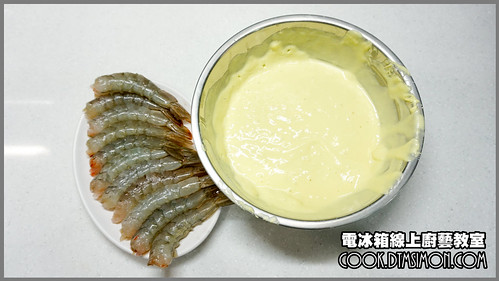
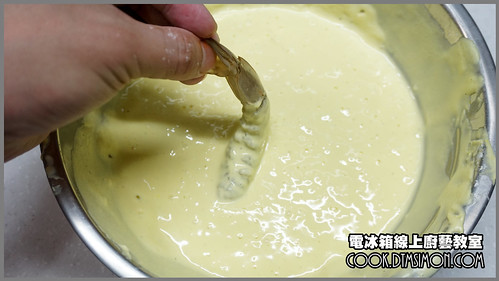
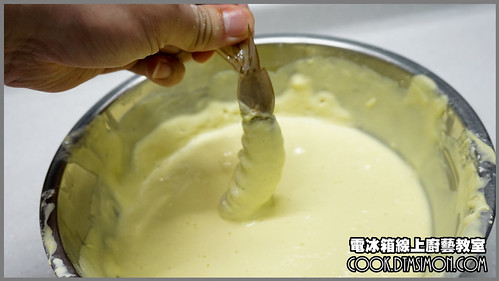
裹上麵糊:鮮蝦跟脆酥粉漿準備好之後,抓住蝦尾,把蝦放到麵糊裡面沾。反覆數次,讓麵糊均勻包住蝦肉的部分。
(Hold the shrimp by the tail and dip it into the batter. Repeat a few times to coat the shrimp meat evenly.)
-
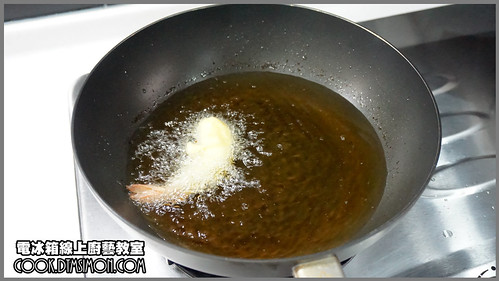
下鍋油炸與定型技巧:接著將蝦放進 180°C 的油中炸。一開始記得不要一下子就把蝦放進去,稍微轉一下蝦身,讓麵糊定型後再整隻下鍋熟成。
(Next, fry the shrimp in 180°C oil. Remember not to drop it in all at once; hold the tail and gently twist the shrimp in the oil to let the batter set before fully releasing it into the wok.)
🎥 炸蝦定型技巧教學影片
成果與心得分享 (Conclusion)
-
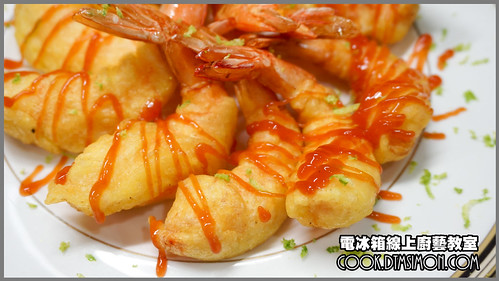
瀝油盛盤:炸好的蝦瀝乾多餘的油,然後擺盤。接著再淋上番茄醬以及檸檬皮碎屑提味,即可上桌!
(Drain the excess oil from the fried shrimp and plate them. Drizzle with ketchup and sprinkle with lemon zest to enhance the flavor, then serve!)
2015/05/13
2015/05/12
2015/04/30
2015/04/18
2015/04/09
2015/03/21
2015/03/19
【食譜】[中式] 古早味炒牛肉
這次過年期間在台南 阿美鮮牛肉湯 吃到這味古早味炒牛肉,回家後就對他念念不忘。只是要吃還得等下次去台南的機會,不想等到天荒地老就在家裡自己破解,想不到還挺容易的,哈哈!
🇺🇸 Read in English
During the Chinese New Year, I had this traditional stir-fried beef at A-Mei Fresh Beef Soup in Tainan. After returning home, I couldn't stop thinking about it. However, I'd have to wait until my next trip to Tainan to eat it again. Not wanting to wait forever, I decided to hack the recipe at home, and surprisingly, it was quite easy, haha!
準備材料 (Ingredients)
🛒 準備材料 (2人份)
- 牛小排火鍋片 (Short Rib Hot Pot Slices): 150 克
- 高麗菜 (Cabbage): 1/6 顆
- 蒜末 (Minced Garlic): 1 大匙
- 辣椒片 (Sliced Chili): 少許
- 醬油 (Soy Sauce): 1 大匙
- 白胡椒粉 (White Pepper Powder): 2 小匙
作法步驟 (Instructions)
-
爆香蒜辣:先在鍋內放一大匙油爆香蒜末跟辣椒片。
(Heat a tablespoon of oil in the pan and sauté the minced garlic and sliced chili until fragrant.)
-
快炒牛肉:等到蒜頭爆香到呈金黃色後,將切段的牛小排火鍋片下鍋迅速拌炒。
(When the garlic turns golden brown, add the cut short rib slices and stir-fry quickly.)
-
調味起鍋:等肉稍微變色後下醬油及胡椒粉,迅速拌炒先起鍋備用。
(When the meat slightly changes color, add soy sauce and white pepper powder. Stir-fry quickly, then remove from the pan and set aside.)
-
炒高麗菜:原鍋將切碎的高麗菜下鍋拌炒。
(In the same pan, stir-fry the chopped cabbage.) -
混合均勻:等高麗菜稍微變軟後,將剛剛炒好的牛肉下鍋拌勻即可。
(When the cabbage becomes slightly soft, return the cooked beef to the pan and mix well.)
成果與心得分享 (Conclusion)
這樣古早味炒牛肉就變出來囉,是不是很簡單呢?因為在家使用的是不沾鍋,所以無法炒出在攤子吃那股鍋氣,不過如果你家裡是用鐵鍋炒也許辦得到喔。
這樣一道料理真的很下飯,濃濃的醬油香真的很開胃。喜歡嗎?記得多多分享出去給更多朋友知道喔~
🇺🇸 Read in English
And just like that, the traditional stir-fried beef is ready. Isn't it simple? Because I used a non-stick pan at home, I couldn't recreate that "wok hei" (breath of the wok) you get at food stalls. However, if you use a carbon steel wok at home, you might just pull it off.
This dish goes incredibly well with rice; the rich soy sauce aroma is very appetizing. Do you like it? Remember to share it with more friends~