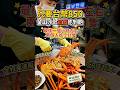
看完了怵目驚心的養殖鮭魚真相,愛吃魚的冰箱絲毫沒有退卻之意,哈哈!
晚上到楓康超市看到這尾澎湖直送的富貴魚,價錢也不貴,就帶回家了。
富貴魚之前我只有在餐廳吃過,當然SIZE比今天這尾大多了。
雖然外貌並不如鯧魚類好看,但是相同尺寸的白鯧價格可能就翻倍囉。
其實富貴魚的肉質相當好,雖然沒有白鯧來得細緻,但是在魚肉中已經
2009/09/29
鹽烤富貴魚


2009/09/26
【食譜】[西式] 蒜味香煎大干貝

這道香煎大干貝是上禮拜家裡請客時的隱藏料理,因為一開始冰箱忘記拿出來退冰,所以等到退冰完成,第一批客人已經離開了。
退完冰的干貝當然要馬上吃掉呀,所以後來它們就變成留下來的人喝酒的下酒菜囉,哈哈哈哈哈!!!
這次選用的是在 COSTCO 買的北海道生食級大干貝,也就是在日本料理店當生魚片吃的那種級數。一盒 999 元裡面約有 16~18 顆,個頭都相當大。算一算一顆成本差不多 60 多塊,還挺划算的,因為這種干貝在日本料理店吃,一顆沒跟你收個幾百塊是不可能的。ANYWAY,就趕緊來看看這道簡單的香煎干貝,我也順便交交作業!
🌐 Read in English
[EN] This pan-fried large scallop dish was a hidden menu item at my home dinner party last week. I actually forgot to thaw them out initially, so by the time they were ready, the first batch of guests had already left. Of course, thawed scallops must be eaten right away, so they turned into the perfect drinking snack for those who stayed behind! Hahaha!
I used Hokkaido sashimi-grade large scallops from Costco—the exact same quality you'd eat raw at a high-end Japanese restaurant. A box cost 999 TWD and contained about 16 to 18 massive scallops. That’s roughly 60 TWD per piece, which is a fantastic deal compared to restaurant prices. Anyway, let's check out this super simple recipe!
📖 本文快速導覽
食材準備清單

- 北海道生鮮大干貝:4 顆 (約 250 克左右)
- 初榨橄欖油:1 大匙
- 現磨玫瑰鹽:少許
- 香蒜粉:少許
- 碎荷蘭芹 (Parsley):少許
- 七味唐辛子:少許
🌐 Read in English
[EN] Ingredients:
- Hokkaido fresh large scallops: 4 pcs (approx. 250g)
- Extra virgin olive oil: 1 tbsp
- Freshly ground rose salt: a little
- Garlic powder: a little
- Dried parsley flakes: a little
- Shichimi Togarashi (Japanese 7-spice blend): a little
料理步驟圖解
Step 1:整塊慢煎
平底鍋加油燒熱後,以慢火先將整塊干貝下鍋煎至表面金黃。

Step 2:分切續煎
用刀子把鍋內的干貝切成適當大小後,每個表面煎至金黃即可起鍋擺盤。
Step 3:調味點綴
最後在干貝上灑上全部的調味料即可,注意干貝本身就有海水鹹度,海鹽千萬別放太多!

🌐 Read in English
[EN] Cooking Instructions:
1. Heat the olive oil in a pan. Sauté the whole scallops over low heat until the surfaces turn golden brown.
2. Use a knife to cut the scallops into bite-sized pieces directly in the pan. Sear all the cut surfaces until golden, then plate them.
3. Sprinkle all the prepared seasonings on top. Note: Scallops have a natural ocean brininess, so go easy on the salt!
試作心得與下酒絕配
這樣的烹調方式,完全可以吃到屬於干貝本身的鮮味跟甜味。調味料在這邊只是類似中藥的「藥引」,是為了把原味給帶出來。


煎得焦香的干貝,拿來下酒真的是又好吃又華麗呀。重點是無敵簡單,又是一道會燒開水就會做的料理,因為慢火煎干貝不需要太去理會它。冰箱可是一邊料理,一邊在廚房中島跟朋友把酒言歡咧。
大家在家可以試試看,保證吃到的人會對你的廚藝刮目相看!
🌐 Read in English
[EN] Tasting Notes:
This cooking method perfectly preserves and highlights the scallops' natural umami and sweetness. The seasonings here act merely as a catalyst to bring out the original flavor.
Beautifully seared scallops make for an incredibly luxurious and delicious drinking snack. Best of all, it's foolproof—if you can boil water, you can make this! Slow-searing means you barely have to tend to it. I was literally chatting and drinking with my friends at the kitchen island while cooking this.
Try it at home! I guarantee your guests will be thoroughly impressed with your culinary skills.

南北貨俱樂部-美食廚藝生活資訊交流天地
Facebook 社團 · 3,643 位成員
+ 加入社團
沒有限制,純粹分享,管你用啥煮東西,好吃就好!歡迎大家分享照片及作法,還有自己的美食用餐經驗~不限烹飪或食譜喔~
食譜分享純屬個人心得!
作者:電冰箱 / Simon
🍽️ 食譜與料理資訊
主廚: 電冰箱 (Simon)
菜色名稱: 宴客級香煎大干貝
料理時間: 約 5-8 分鐘 (不含備料解凍)
美味秘訣: 慢火乾煎帶出鮮甜,海鹽僅需微量提味即可!
相關同好會社團:
- 台灣牛肉麵同好會俱樂部
- 台灣燒肉同好會俱樂部
- 台灣臭豆腐同好會俱樂部
- 台灣便當同好會俱樂部
2009/09/23
【食譜】[西式] 英式烤牛肉+烤松阪豬

上禮拜六冰箱請朋友來家裡面吃晚餐,理由是這一ㄊㄨㄚ已經積欠很久。
出來跑,總是要還的.....哈哈哈....
其實這次的晚宴前冰箱自己很HIGH,因為終於有機會可以做整條的
英式烤牛肉來吃囉。沒辦法,阿德不吃牛肉,所以平常自己在家做
只會把自己撐死,可能烤一次會3個月不敢吃牛排....
朋友到家裡來是最好的機會,三兩下就可以把一條牛肉吃完囉,哈哈!
2009/09/20

2009/09/11

2009/09/02
鹹蛋火腿炒飯

今天家裡拜地基主,有一些拜拜過的冷飯,翻翻冰箱看到火腿跟鹹蛋,於是決定來試試看「鹹蛋炒飯」好不好吃。
以往炒飯我都是用大火快炒,這種炒法必須時時翻鍋以免燒焦。雖然很香,但是每次過程都好像在打仗,很忙!今天既然利用了鹹蛋,心想來試試看用「小火慢炒」的效果如何?
經實驗證明,雖然火比以往小很多,但是炒出來的飯還是一樣很好吃。這種烹調方式即使家裡沒廚房,用卡式爐或電磁爐也可以炒出好吃的飯,感覺真不賴!有需要的朋友可以自行參考,祝大家炒飯愉快XD。
🇺🇸 Read in English
Today, we had some leftover cold rice from a religious offering. I checked the fridge and found some ham and salted duck eggs, so I decided to try making Salted Egg Fried Rice.
Usually, I use high heat for fried rice, which requires constant tossing to prevent burning. It's fragrant, but it always feels like fighting a war in the kitchen! Today, since I was using salted eggs, I thought I'd experiment with stir-frying slowly over low heat.
The experiment was a success! Even though the heat was much lower than usual, the fried rice still turned out delicious. This cooking method is great because you can make it even if you don't have a full kitchen—a portable stove or induction cooker works just fine. Happy cooking, everyone!
準備材料 (Ingredients)

🛒 主要食材
- 冷飯 (Cold Rice): 約 2 碗
- 中式火腿丁 (Diced Chinese Ham): 1/2 杯
- 熟鹹鴨蛋 (Salted Duck Egg): 1 顆 (打散)
- 青蔥 (Scallions): 1/2 杯 (切蔥花)
- 蒜末 (Minced Garlic): 2 大匙
- 黑胡椒粉 (Black Pepper): 適量
💡 冰箱小秘訣:
強烈建議使用「中式火腿丁」,因為香氣比較足夠。而且因為利用了鹹鴨蛋與火腿本身的鹹度,這道炒飯完全不需要額外加鹽巴或醬油調味,是一道非常適合懶人來作的餐點!
強烈建議使用「中式火腿丁」,因為香氣比較足夠。而且因為利用了鹹鴨蛋與火腿本身的鹹度,這道炒飯完全不需要額外加鹽巴或醬油調味,是一道非常適合懶人來作的餐點!
作法步驟 (Instructions)
-
小火爆香:在鍋內放約一大匙油,用小火將油熱了以後,將蒜末下鍋爆香。因為是小火,所以蒜末比較不會燒焦,稍微爆到有點金黃即可,這樣蒜頭的香氣就會留在油裡面。
(Add about 1 tbsp of oil to a pan and heat it over low heat. Add the minced garlic and sauté. Because it's on low heat, the garlic won't burn easily. Sauté until slightly golden so the garlic aroma infuses the oil.) -
炒香火腿:接著將中式火腿丁下鍋跟蒜末一起拌炒,炒到火腿香味出來。
(Add the diced Chinese ham and stir-fry with the garlic until the ham becomes fragrant.)

-
下飯拌勻:將冷飯下鍋,用鏟子將飯打散,使飯粒能均勻沾到油。
(Add the cold rice to the pan. Use a spatula to break up the rice, ensuring the grains are evenly coated with the oil.) -
加入鹹鴨蛋:然後下打散的鹹鴨蛋,用鏟子或甩鍋將所有材料拌炒均勻。
(Add the beaten salted duck egg. Toss the pan or use the spatula to stir-fry everything evenly.) -
調味起鍋:最後加入蔥花、灑上黑胡椒粉,拌炒均勻之後即可裝盤上桌。
(Finally, add the chopped scallions and a sprinkle of black pepper. Stir well and it's ready to serve!)


成果與心得分享 (Conclusion)
雖然沒有大火快炒,但炒出來的飯依然粒粒分明,口感也是很棒。利用鹹鴨蛋與中式火腿丁,完全不需要額外調味,大家在家也可以輕鬆試試看囉~~
🇺🇸 Read in English
Even without high-heat stir-frying, the rice grains are perfectly separated, and the texture is fantastic. By utilizing the natural saltiness and aroma of the salted duck egg and Chinese ham, there's absolutely no need for extra seasoning. It's an incredibly easy and delicious meal to make at home!

追蹤更多美食與食譜資訊


 發表文章
發表文章