大家一起來快樂地做料理吧! 南北貨俱樂部

2017/06/19

【食譜】[日式] 【深夜食堂試作食譜系列】-01沒有麵的湯麵

《深夜食堂》是日本一部非常有名的漫畫,日前買了 NETFLIX 會員之後,第一步追的劇就是他們自製的《深夜食堂:東京故事》,一共 13 集。這一套劇的第一集,端出來的就是這碗客人指定「沒有麵的湯麵」。

覺得看起來不難做,決定自己依樣畫葫蘆來試做一下,沒想到效果還不錯,那就趕快來看看這一碗怎麼變出來吧!
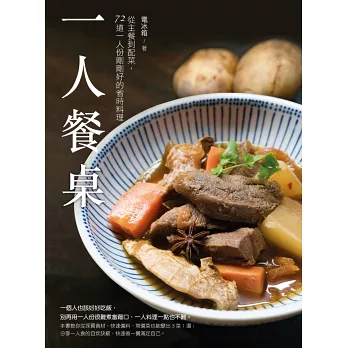

電冰箱最新食譜書各大通路熱賣中
一人餐桌這邊買唷

🌐 Read in English

[EN] "Midnight Diner" is a very famous Japanese manga. After getting a Netflix subscription recently, the first show I binge-watched was their original series "Midnight Diner: Tokyo Stories" (13 episodes in total). In the very first episode, they served a special off-menu item requested by a customer: "Tanmen without noodles" (Vegetable Soup).

It didn't look too hard to make, so I decided to recreate it at home. To my surprise, it turned out really well! Let's see how you can whip up this comforting bowl of soup.

劇中原版參考與食材準備

《深夜食堂》劇中的沒有麵的湯麵

劇中就是這碗,接下來我們就來做做實驗吧!(圖片取自 Google 搜尋)

【材料準備】

  • 豬白肉涮片
  • 豆芽菜
  • 木耳絲
  • 高麗菜
  • 青蔥段
  • 紅蘿蔔片

※ 以上材料份量都視個人喜好斟酌即可~

【調味料】

  • 日本味霸(味覇 Weipa):1 小匙
🌐 Read in English

[EN] Ingredients & Seasoning:

  • Sliced pork belly
  • Bean sprouts
  • Shredded wood ear mushrooms
  • Cabbage
  • Green onion segments
  • Sliced carrots

*Adjust the amounts according to your preference!

Seasoning: 1 teaspoon of Weipa (Japanese Chinese-style seasoning paste).

料理步驟圖解

Step 1 & Step 2:爆香與炒料
1. 將白肉涮片先下鍋,乾鍋不放油拌炒。
2. 等到白肉片稍微變白且出油之後,將木耳絲、紅蘿蔔片、蔥段等一起下鍋拌炒。

Step 3 & Step 4:加入蔬菜與水分
3. 接下來,放入高麗菜跟豆芽一起炒。
4. 等菜差不多都半軟了,加水大約至炒鍋 7 分滿左右。

Step 5:調味完成
5. 燒開之後,加入調味品或單純以鹽調味都可以,這樣中華野菜拉麵的基本湯底就完成了!

🌐 Read in English

[EN] Cooking Instructions:

1. Pan-fry the sliced pork belly in a dry wok without adding any extra oil.
2. Once the pork turns white and releases its natural fats, add the wood ear mushrooms, sliced carrots, and green onions, then stir-fry them together.
3. Next, toss in the cabbage and bean sprouts.
4. When the vegetables are softened, pour water into the wok until it's about 70% full.
5. Bring it to a boil, then stir in the seasoning (Weipa or simply salt). Now your Chinese-style vegetable ramen broth is ready!

試作心得與調味筆記

因為劇中顧客要求不要放麵,所以就造就這碗「沒有麵的湯麵」囉!

調味方面,其實日本人味精吃很大,所以也不需要刻意去著墨在放不放現成調味料上面。如果只加鹽調味的話,鮮味會差一點,這點給大家做實作研究上的參考。

NETFLIX 13 集劇情中的料理,可能冰箱沒辦法全部都變出來。就像有一集做梅干,那已經是職人等級的行為,我們這種兩光師還是不要亂搞比較好;還有一集有用到吻仔魚,那個基於生態考量我也不做。其他剩下的,就視這一篇大家的反應,再衡量要不要花時間去研究囉~食譜沒人看,也不用寫了不是嗎?XD

🌐 Read in English

[EN] Recipe Notes:

Since the customer in the show asked to leave the noodles out, we get this wonderful "Tanmen without noodles"!

Regarding the seasoning, Japanese cooking often utilizes umami boosters like MSG, so using a premade seasoning paste like Weipa makes it very authentic. If you only use salt, the broth might lack that deep savory punch—just something to keep in mind!

南北貨俱樂部-美食廚藝生活資訊交流天地
Facebook 社團 · 3,643 位成員
+ 加入社團
沒有限制,純粹分享,管你用啥煮東西,好吃就好!歡迎大家分享照片及作法,還有自己的美食用餐經驗~不限烹飪或食譜喔~

食譜分享純屬個人心得!
作者:電冰箱 / Simon

🍽️ 食譜與料理資訊

主廚: 電冰箱 (Simon)

菜色名稱: 沒有麵的湯麵 (深夜食堂食譜致敬)

美味秘訣: 豬肉乾煸出油後再炒菜,加入味霸提鮮最對味!

相關同好會社團:
- 台灣牛肉麵同好會俱樂部
- 台灣燒肉同好會俱樂部
- 台灣臭豆腐同好會俱樂部
- 台灣便當同好會俱樂部

Share:

2017/06/16

【食譜】[中式] 小吃破解DIY-沙茶魷魚羹

台式小吃魷魚羹

魷魚羹是冰箱很愛很愛的小吃之一,在外面有看到沒吃過的店,幾乎都會想停下來嚐嚐。隨著物價上漲,現在吃魷魚羹真的是越來越貴,小小一碗,往往都要價 45 元以上,吃得壓力好大。

其實要做魷魚羹一點都不難,在家煮一大鍋愛吃多少就吃多少,那我們就一起來煮吧!

🇺🇸 Read in English

Squid Thick Soup (Youyu Geng) is one of my absolute favorite Taiwanese street foods. Whenever I see a shop I haven't tried before, I almost always stop for a bowl. However, with rising prices, eating this dish outside is getting more expensive—a small bowl often costs over 45 TWD, which feels like a lot of pressure on the wallet.

Actually, making squid thick soup at home is not difficult at all! You can cook a large pot and eat as much as you want. Let's make it together!

食材小知識:筍絲、柴魚湯底與魚漿

真空包裝筍絲
醃製的真空筍絲
洗去鹽分的筍絲
洗掉多餘鹽份

魷魚羹裡面有一樣相當重要的食材叫做筍絲。夏天是竹筍產季,自己買鮮筍切絲比較經濟實惠;若冬天筍子不多,就可以利用這種真空包的筍絲。雖然鮮甜度不若鮮筍,但口感還是不差的。因為這種筍絲含鹽量很高,一開始要先花點時間洗掉鹽味,大約換個三次水就可以了。

築地鰹節粉
築地買回來的鰹節粉
鰹節粉近照
用來熬煮柴魚湯底非常方便

羹湯的湯底大多是柴魚風味。剛好家裡有從築地帶回來的鰹節粉,這粉真的超方便,小小一匙用熱水泡開就是好喝的柴魚湯。如果找不到這種,用一般的柴魚片或烹大師鰹魚風味來熬湯也可以。

準備材料 (Ingredients)

🛒 主要食材

  • 發泡魷魚 (Rehydrated Squid): 適量 (建議選用魷魚翅部位口感最好)
  • 魚羹 (Fish Paste Chunks): 1 碗 (可用新鮮鯊魚漿或旗魚漿製作)
  • 筍絲 (Bamboo Shoot Shreds): 300g
  • 雞蛋 (Egg): 1 顆
  • 九層塔 (Basil): 少許
  • 柴魚片或鰹魚粉 (Bonito Flakes or Powder): 適量
  • 玉米粉 (Cornstarch): 1 碗 (勾芡用)

🧂 調味料

  • 鹽巴 (Salt): 少許
  • 糖 (Sugar): 1 大匙
  • 味精 (MSG): 少許 (若不喜歡可省略)
  • 白胡椒粉 (White Pepper): 少許
  • 醬油 (Soy Sauce): 2 大匙 (調色用)
  • 沙茶醬 (Shacha Sauce): 適量 (可用香油稀釋備用)
  • 香油 (Sesame Oil): 適量
  • 烏醋 (Black Vinegar): 適量

作法步驟 (Instructions)

  • 熬煮湯底與筍絲:取一深鍋加水至八分滿約 5 公升,將水煮開後,放入柴魚片或是 3 大匙鰹節粉熬成湯底。接著將剛剛洗好的筍絲下鍋,連同高湯一起滾煮約 15 分鐘備用。最後轉小火保溫慢滾,再把魚羹加到湯裡面。
    (Boil about 5 liters of water in a deep pot. Add bonito flakes or powder to make the broth base. Add the washed bamboo shoot shreds and boil for about 15 minutes. Turn to low heat, then add the fish paste chunks into the soup.)
    熬煮筍絲與魚羹
  • 調味與勾芡:加入適量的鹽巴、白胡椒粉調味,並利用少許醬油調色。接著利用玉米粉勾濃芡(玉米粉兌水慢慢勾,用玉米粉勾出的羹湯比較不會反水)。
    (Season with salt and white pepper, and use a little soy sauce for color. Thicken the soup with a cornstarch slurry. Cornstarch is preferred as it prevents the soup from thinning out later.)
    調味與勾芡
  • 打入碎蛋花:勾完芡之後,將一顆蛋打散,然後倒進去打成碎蛋花。這樣基本的羹湯底就完成了,把火開到最小慢慢滾。
    (After thickening, beat an egg and slowly pour it in to create an egg drop effect. Keep the heat on the lowest setting.)
    加入碎蛋花
鯊魚漿製作的魚羹
自製魚羹粒口感紮實
完美的羹湯底
滿滿筍絲與蛋花的羹湯底
  • 汆燙魷魚:因為發泡魷魚不耐煮,所以要吃之前現燙再加到湯裡口感最好。將魷魚下鍋汆燙至稍微蜷曲,即可起鍋。
    (Because rehydrated squid overcooks easily, it's best to quickly blanch it in boiling water just before serving until it slightly curls up.)
    汆燙魷魚
  • 組裝盛盤:碗中裝入熱騰騰的羹湯底與現燙的魷魚,放上新鮮九層塔,淋上用香油稀釋過的沙茶醬與烏醋,即可上桌享用!
    (Ladle the hot soup into a bowl, add the blanched squid, top with fresh basil, and drizzle with black vinegar and shacha sauce diluted with sesame oil. Serve and enjoy!)
新鮮九層塔
靈魂配料:九層塔
香油沙茶醬
香油稀釋的沙茶醬

成果與心得分享 (Conclusion)

這樣一碗在外面應該也要賣到 45 元以上吧?自己在家 DIY,魷魚吃通海都沒關係,只怕買不夠回家吃啊!

🇺🇸 Read in English

A bowl like this would easily cost over 45 TWD outside. By making it yourself at home, you can add as much squid as you want without worrying about the cost. The only fear is not buying enough squid to satisfy your cravings!


加入「南北貨俱樂部」社團

沒有限制,純粹分享,管你用啥煮東西,好吃就好!
歡迎大家分享照片及作法,不限烹飪或食譜,食記或生活資訊也OK喔~

+ 立即加入 FB 社團

追蹤更多美食與食譜資訊

Walkerland窩客島星級窩客

本文照片由 SONY A7R II 拍攝

Share:

2017/05/26

【食譜】[中式] 梅汁苦瓜漬


梅汁苦瓜漬00.jpg

夏天是苦瓜盛產的季節,天氣越來越熱,多吃苦瓜可以清肝降火,價格
又不貴,真的是一舉數得。只是苦瓜的吃法,並不只是拿來烹煮,拿來
做成漬物,涼涼的吃也很消暑喔。

Share:

2017/05/14

【食譜】[中式] 涼拌鴨掌

涼拌鴨掌

天氣越來越熱,這個時候來個重口味的涼拌菜,既消暑又開胃。涼拌鴨掌是我自己很喜歡吃的一道小菜,不過每次上館子吃,一小盤沒幾塊就要 30~50 元,真的不便宜。

其實自己到傳統市場買人家去骨好的鴨掌,一斤差不多只要 80 元。做好的量,大概外面一盤 30 元的可以出 10 盤左右!自己在家做,衛生看得見,也經濟實惠。

🇺🇸 Read in English

As the weather gets hotter, a strongly flavored cold dish is both refreshing and appetizing. Cold tossed duck feet is one of my favorite side dishes, but eating it at restaurants is quite expensive—a small plate with just a few pieces costs 30-50 NTD.

Actually, if you go to a traditional market and buy pre-deboned duck feet, half a kilo only costs about 80 NTD. The amount you make at home is equivalent to about 10 plates at a restaurant! Making it yourself is not only economical but also guarantees hygiene.

清脆的涼拌鴨掌

準備材料 (Ingredients)

這道菜因為食材特性的關係,會用到一點點味精調味。其實不放也沒有關係,只是味道比較沒有那麼鮮美。夏天小黃瓜也不貴,拌點進去味道也相當不錯。

🛒 主要食材

  • 去骨鴨掌 (Deboned Duck Feet): 1 斤 (約 600g)
  • 小黃瓜 (Cucumber): 1 條
  • 紅蘿蔔絲 (Shredded Carrots): 少許
  • 薑絲 (Shredded Ginger): 少許
  • 蒜末 (Minced Garlic): 1 大匙

🧂 調味料

  • 辣椒醬 (Chili Sauce): 1 大匙
  • 糖 (Sugar): 2 小匙
  • 香油 (Sesame Oil): 1 大匙
  • 醋 (Vinegar): 酌量 (推薦添加)
  • 味精 (MSG): 1 小匙 (可省略)
  • 鹽 (Salt): 酌量

作法步驟 (Instructions)

  • 清洗與分切:將買回來的去骨鴨掌分切至就口大小(約一口一個),然後用冷開水清洗 2~3 次瀝乾。
    (Cut the deboned duck feet into bite-sized pieces, then wash them 2-3 times with cold boiled water and drain well.)
  • 處理配料:小黃瓜去籽切條,紅蘿蔔切絲,薑切絲,蒜頭切末備用。
    (Remove the seeds from the cucumber and cut it into strips. Prepare the shredded carrots, shredded ginger, and minced garlic.)
加入調味料拌勻
將所有材料與調味料拌勻
冷藏醃製
放入冰箱冷藏使其入味
  • 拌勻與冷藏入味:將所有材料與調味料放在碗裡拌勻,然後放在冰箱靜置約 3 小時讓食材入味即可。(建議最少醃個一天,味道會最好)
    (Mix all the ingredients and seasonings in a bowl. Let it sit in the refrigerator for about 3 hours to absorb the flavors. For the best taste, it's recommended to marinate it for at least a day.)
💡 冰箱小秘訣:外面有的店家做的版本沒有加醋,但是我覺得沒有加醋吃多了會有點膩口。建議大家還是放一點醋,不但能提味,也有些許防腐保鮮的效果喔!

成果與心得分享 (Conclusion)

自己在家做,想吃多少就做多少。做好的成品,放在冰箱冰個 5~7 天應該都不會壞掉。

鴨掌富含膠原蛋白,脆脆的口感非常「涮嘴」。這東西在我家,絕對活不過兩天就被我一個人幹掉了,分享給也愛這道小菜的你~

🇺🇸 Read in English

💡 Tip: Some restaurants don't add vinegar to this dish, but I find it a bit greasy without it. I highly recommend adding a little vinegar—it not only enhances the flavor but also acts as a mild preservative!

When you make it at home, you can control the portions. The finished dish can be kept in the fridge for 5-7 days. Duck feet are rich in collagen, and their crunchy texture is extremely addictive. In my house, this dish never survives past two days before I finish it all by myself! Sharing this recipe with everyone who loves a good appetizer.


加入「南北貨俱樂部」社團

沒有限制,純粹分享,管你用啥煮東西,好吃就好!
歡迎大家分享照片及作法,不限烹飪或食譜,食記或生活資訊也OK喔~

+ 立即加入 FB 社團

追蹤更多美食與食譜資訊

Walkerland窩客島星級窩客
Share:

2017/03/30

【食譜】[中式] 西芹炒帶子

雖然用到西芹,不過這道可是貨真價實的中菜喔!新鮮的帶子(干貝),其實不需要太繁複的烹調,就可以很美味。搭配西芹以及蘿蔔等,不但配色好看,營養也滿百,是大人小孩都愛吃的料理。


電冰箱最新食譜書各大通路熱賣中
一人餐桌這邊買唷

🌐 Read in English

[EN] Although celery is used here, this is an authentic Chinese dish! Fresh scallops don't require complicated cooking to taste amazing. Paired with celery and carrots, it's not only colorful but also packed with nutrients—a dish that both adults and children will absolutely love.

食材準備清單 (約4人份)

  • 產銷履歷大干貝:9 顆
  • 西芹:2 根
  • 胡蘿蔔片:6 片
  • 薑絲:少許
  • 蒜仁:3~4 顆
  • 辣椒片 (裝飾用):少許
  • 香油:少許
  • 烹大師 (干貝口味):2 小匙
🌐 Read in English

[EN] Ingredients (Serves 4):

  • Large Scallops: 9 pcs
  • Celery: 2 stalks
  • Carrot: 6 slices
  • Shredded Ginger: A little
  • Garlic Cloves: 3-4 pcs
  • Chili Slices (for garnish): A little
  • Sesame Oil: A splash
  • Hondashi (Scallop Flavor): 2 tsp

料理步驟圖解

Step 1 & Step 2:解凍與汆燙
1. 冷凍干貝要使用前,記得放到冷藏慢慢解凍,比較不會出水。
2. 西芹切段,連同胡蘿蔔片先過水汆燙 20 秒,瀝乾備用。

Step 3 & Step 4:干貝過油
3. 接著將干貝先過油,過油時間不用太長,差不多在 15 秒左右。記得干貝過油時油溫一定要高,不然干貝會出水,出水就會油爆。
4. 過好油的干貝,瀝乾油備用。

Step 5 & Step 6:爆香與拌炒
5. 鍋內留一大匙油,蒜仁拍碎,跟薑絲一起爆香。
6. 接著將剛剛處理過的所有食材,通通下鍋拌炒。

Step 7 & Step 8:調味與盛盤
7. 最後加入半碗水,燒開後加入烹大師拌勻,稍微收汁即可。如果喜歡,在這個步驟也可以勾點薄芡,賣相會更佳,起鍋前淋上香油。
8. 盛盤後再撒上辣椒片作點綴,一道好吃、請客也體面的西芹炒帶子就完成囉~

🌐 Read in English

[EN] Instructions:

1. Thaw frozen scallops slowly in the refrigerator to prevent them from releasing too much water.
2. Cut celery into sections. Blanch them with carrot slices in boiling water for 20 seconds, then drain.
3. Briefly deep-fry the scallops for about 15 seconds. Ensure the oil temperature is high; otherwise, the scallops will release water and cause the oil to splatter.
4. Drain the scallops and set aside.
5. Leave 1 tablespoon of oil in the wok. Crush the garlic cloves and stir-fry with shredded ginger until fragrant.
6. Add all the pre-cooked ingredients into the wok and toss well.
7. Add half a bowl of water. Once it boils, stir in the Hondashi seasoning and let the sauce reduce slightly. You can add a little starch slurry to thicken the sauce for a better glossy look. Drizzle with sesame oil right before turning off the heat.
8. Plate the dish and garnish with chili slices. A delicious and presentable Celery Stir-fried Scallops is ready to serve!

料理小秘訣 (Tips)

Q:為什麼干貝要先過油?西芹要先過水?
A: 因為我們家中爐具的火力跟飯店的快速爐差太多,所以必須先把食材處理到稍微有熟度,再來快速拌炒料理,不僅口感更好,也比較方便唷~

🌐 Read in English

[EN] Cooking Tips:

Q: Why do we need to deep-fry the scallops and blanch the celery first?
A: Because home stoves have much lower heat compared to commercial woks in restaurants. Pre-cooking the ingredients slightly ensures they cook evenly and quickly during the final stir-fry step, resulting in a much better texture!

南北貨俱樂部-美食廚藝生活資訊交流天地
Facebook 社團 · 3,643 位成員
+ 加入社團
沒有限制,純粹分享,管你用啥煮東西,好吃就好!歡迎大家分享照片及作法,還有自己的美食用餐經驗~不限烹飪或食譜喔~

本文照片由 SONY A7R II 拍攝
食譜分享純屬個人心得!
作者:電冰箱 / Simon

🍽️ 食譜與料理資訊

主廚: 電冰箱 (Simon)

菜色名稱: 西芹炒帶子

料理時間: 約 15 分鐘 (不含備料解凍)

相關同好會社團:
- 台灣牛肉麵同好會俱樂部
- 台灣燒肉同好會俱樂部
- 台灣臭豆腐同好會俱樂部
- 台灣便當同好會俱樂部

Share:

2017/03/29

【食譜】[西式] 蒜味香煎大干貝

由於通路的發達,現在要在台灣買到優質的北海道生食級大干貝,只要滑滑手機上網,就一定買得到。這時如果不知道如何挑選的話,那就選擇有產銷履歷認證的誠實產品準沒錯。新鮮的干貝,其實生吃是最棒的。

如果不敢生食,其實簡單煎一下也相當美味,而且做法超簡單又快速,真的不需要為了吃一口干貝還得大老遠出門去餐廳,在家就能輕鬆享受到媲美五星級餐廳水準的料理囉!


電冰箱最新食譜書各大通路熱賣中
一人餐桌這邊買唷

🌐 Read in English

[EN] Thanks to modern logistics, you can easily buy premium sashimi-grade Hokkaido scallops online in Taiwan just by swiping your phone. If you're unsure how to choose, going for products with traceability certifications is always a safe bet. Fresh scallops are best enjoyed raw, but if you're not a fan of raw seafood, simply pan-searing them is incredibly delicious too!

The cooking process is super easy and fast. You really don't need to travel far to a fancy restaurant just for a bite of scallop—you can easily enjoy a 5-star dish right at home!

食材準備清單 (3~4人份)

  • 北海道產銷履歷生食級大干貝:9 顆
  • 節瓜:1/2 條
  • 鹽:適量
  • 香蒜粉:少許
  • 七味唐辛子粉:少許
  • 洋香菜葉 (Parsley):少許
🌐 Read in English

[EN] Ingredients (Serves 3-4):

  • Hokkaido sashimi-grade scallops: 9 pcs
  • Zucchini: 1/2 pc
  • Salt: to taste
  • Garlic powder: a little
  • Shichimi Togarashi (Japanese 7-spice blend): a little
  • Dried Parsley leaves: a little

料理步驟圖解

Step 1 & Step 2:食材解凍與辛香料介紹
1. 上圖就是可生食的北海道大干貝。買回家之後放在冷藏慢慢解凍,然後把生出來的水倒掉備用。干貝出的水,其實可以拿來加在湯裡面,有不錯的提鮮效果喔。
2. 準備好三款方便的辛香料,台灣知名品牌出品,各大超市應該都買得到。

Step 3 & Step 4:炙烤節瓜
3. 節瓜切成約 0.5 公分的薄片備用。
4. 將切好的節瓜,上炙烤盤以中火炙烤。

Step 5 & Step 6:節瓜調味與擦乾干貝
5. 等到一面出現微焦炙痕,再翻面烤到一樣狀況即可起鍋。起鍋前,可以先灑一點鹽巴提味,這樣節瓜吃起來會很清甜。
6. 接下來我們來煎干貝,因為干貝本身含水量相當豐富,所以下鍋之前,請先用乾淨的布或廚房紙巾,把多餘的水分先擦乾。擦干貝的時候,可以同時大火熱鍋。

Step 7 & Step 8:高溫快煎
7. 接著灑一點點鹽在干貝上面。
8. 等鍋內的油也熱了,就把剛剛處理好的干貝下鍋。因為干貝很容易熟,這時候就是干貝成品美味與否的關鍵。記得一個訣竅:就是大火不要停,一面煎 30 秒就可以翻面。

Step 9 & Step 10:翻面與盛盤
9. 另外一面也是以相同步驟操作。其實 30 秒是參考值,基本上如果干貝的表面已經呈現漂亮的微焦色,其實就差不多七分熟囉。
10. 搭配剛剛烤好的節瓜擺盤,其實這樣子的香煎干貝就已經十分美味了。

Step 11:香料點綴
最後灑上一點剛剛準備的調味料(香蒜粉、七味粉、洋香菜葉),味道層次會更加豐富,拿出來當作宴客菜也相當體面唷~

🌐 Read in English

[EN] Cooking Instructions:

1. Slowly thaw the scallops in the fridge. Discard the excess liquid, or save it to add a seafood umami boost to your soups.
2. Prepare your spices (Garlic powder, Shichimi, Parsley).
3. Slice the zucchini into 0.5cm thick rounds.
4. Grill the zucchini slices on a grill pan over medium heat.
5. Once grill marks appear, flip them over. Sprinkle a little salt right before removing from the pan to bring out their natural sweetness.
6. Scallops hold a lot of water. Crucial step: Pat them completely dry with paper towels before cooking. Meanwhile, heat your pan over high heat.
7. Sprinkle a tiny bit of salt over the scallops.
8. Add the scallops to the hot oiled pan. Pro tip: Keep the heat high! Sear one side for just about 30 seconds before flipping.
9. Repeat for the other side. 30 seconds is a benchmark; once the surface develops a nice golden-brown crust, they are about medium-well and ready.
10. Plate them alongside the grilled zucchini.
11. Finally, sprinkle the prepped spices on top. This elevates the flavor profile and makes it a highly presentable dish for guests!

料理實作影片教學

這邊有現場操作的 Facebook 直播影片可以參考~ 這樣有沒有很簡單?喜歡記得多多分享喔~

南北貨俱樂部-美食廚藝生活資訊交流天地
Facebook 社團 · 3,643 位成員
+ 加入社團
沒有限制,純粹分享,管你用啥煮東西,好吃就好!歡迎大家分享照片及作法,還有自己的美食用餐經驗~不限烹飪或食譜喔~

本文照片由 SONY A7R II 拍攝
食譜分享純屬個人心得!
作者:電冰箱 / Simon

🍽️ 食譜與料理資訊

主廚: 電冰箱 (Simon)

菜色名稱: 媲美五星級的香煎大干貝

料理時間: 約 10 分鐘 (不含備料解凍)

美味秘訣: 下鍋前務必擦乾水分,維持高溫大火快煎!

相關同好會社團:
- 台灣牛肉麵同好會俱樂部
- 台灣燒肉同好會俱樂部
- 台灣臭豆腐同好會俱樂部
- 台灣便當同好會俱樂部

Share:

Search This Blog

技術提供:Blogger.

HISTATS

since 03/28/2013

Blog Archive

Categories

最新吃喝玩樂資訊都在這裡

Translate this page

媒體合作訪問紀錄

電視媒體訪問:

20120829 中視數位新聞快樂生活王545集專訪
20130915 UDN TV 財經新視界 節目特別來賓

報紙副刊料理示範:

20100809 蘋果日報副刊泰式涼拌菜示範
20120304 自由時報週末生活版電冰箱私房便當菜

雜誌特約邀稿:

小日子雜誌
20130301 No.11 平民便當封面故事專欄共筆

Taipei Walker
201307 專題介紹暨達人推薦
201308 夜市專題達人推薦
201310 全台人氣餐廳大搜查推薦

野趣生活家
No.107"食在好時光" 澎湖農特產 料理示範
No.108"食在好時光" 王功農特產 料理示範
No.110"食在好時光" 布袋農特產 料理示範

食尚玩家攝影專刊-每次拍照都成功
小DC也能拍出大師級作品專稿

講座分享紀錄:

20121107 長庚大學住宿生生活講座主講
20120915 Y!一卡皮箱小聚No.13現場分享
20130926 家樂氏SPECIAL K創意料理教學分享

廣播:

20120813 中廣吳恩文快樂廚房現場專訪
20120831 新竹IC之音週五單元"美味人生"專訪
20120902 Bravo生活學苑節目專訪
20120904中廣高雄台午夜開賣啦!節目專訪
20120906 NEWS 98 一刻看世界節目專訪
20120909 中廣高雄台幸福新人生節目專訪
20120911 大千電台超級頭殼節目專訪
20120914 正聲廣播電台星光音樂盒節目專訪
20121003 高雄廣播電台午後陽光I節目專訪
20121008 中廣高雄台幸福新人生節目專訪
20121025漢聲電台部落格好心情節目專訪
20121029 HengStyle 生活網站"恆角色"專訪
20121221 中廣高雄台幸福新人生節目專訪
(教您如何利用剩下的年菜)

本站各項紀錄

2007/01 正式開始在無名小站發表食譜類文章

2007/08 食譜作品開始在YAHOO首頁曝光

2009/01 簡單手作-情人創作料理合輯出版

2012/07 電冰箱的菜櫥子-十分鐘輕鬆上桌食譜書出版

2013/03 本站自南北貨俱樂部吃喝玩樂誌獨立分出,以專業食譜參考網站為將來方向

2013/09 無名小站-南北貨俱樂部正式關站,累積人氣490萬餘。

2013/10 本站累積瀏覽人次10萬達成
2014/03 本站累積瀏覽人次20萬達成
2014/05 本站累積瀏覽人次30萬達成
2014/12本站累積瀏覽人次40萬達成
2015/04本站累積瀏覽人次50萬達成

本站歷年食譜大全

Related Posts Plugin for WordPress, Blogger...

我寫的食譜書


友站連結

部落格排行榜

你來自哪個國家?

Flag Counter

Pages

Theme Support